Friday, February 11, 2011

It's almost V-Day!


Image from the US Cranberries website

Hello dear friends, I know have been away for some time, but I am so glad to be back! Happy 2011, hope the year is off to a great start for you all. It's been an amazing year so far for us, I cannot wait to see what the rest of 2011 holds!! As I think about my Valentine (my lovely husband Daniel) I want to say a huge congratulations to him on opening up his photography studio this past month, exciting times and much success!!

I'm sure you're all aware of what holiday is coming up in 3 days...how could you possibly miss all of the red and pink heart decorations everywhere...lol :) This year I thought I would seek out unusual V-Day decorations and gift ideas, inspired by a link sent to me by my dear friend Arna Banana (thanks AB!). Arna recently sent me a link to a fantastic idea...if you want to give someone your heart this V-Day, you can literally do so...well, A HEART, not specifically yours...check out this fabulous "Anatomical Heart"cake gift idea at "Lily Vanilli Cake Fight".


I recently found out...thanks Honey...that in the USA people don't say "Love Heart" to identify the graphical representation that we all recognize as being a heart..apparently the Americans simply use "Heart". My husband laughs when I say "Love Heart", but I just can't help it! We Australians like to distinguish what type of heart we are talking about...how do you know which one it is if you just say "Heart"? Anyways, since receiving Arna's email I thought I would stick with the "Anatomical Heart" theme for this year's V-Day!

There are many cool V-Day cards with this theme that I found. Being a huge fan of pop-up cards, this is one of my favourites:


You can buy it on ETSY from "tracyhong"....very cool!

Ok, so who doesn't need a million bags??? And who wouldn't want their own anatomical heart tote bag to carry around on V-Day? Well, if you want one, then Zazzle has the perfect gift for you...I think this is pretty fun!

ETSY is one of my favourite sites EVER! I browse that site more often than I care to admit, but they really have some fantastic stuff, and most of the time it will be a one-off original, and who doesn't love that? Here are some of my favourite items for this theme from ETSY:

Crochet heart anyone? This cute gift idea comes from "AnOptimisticCynic", she has some fantastic stuff, check out her shop if you have a strange sense of humour like me :)

I really like this beautiful hand blown miniature "Heart in a Jar" necklace from "kivaford"


For those who may need an outfit for that special evening, how about a "skeleton beating heart" dress from "repurposefulpunk"?


Now, not everyone cal pull-off that dress (or wants to), so if your Valentine is a little more conservative, perhaps a "patchwork heart pincushion" from "amazingowl" is more to your taste?


And for those with a sweet tooth, "Think Geek" (another favourite site of mine!) has some delicious looking anatomical heart candy for you!


Happy V-Day everyone <3

Saturday, December 4, 2010

Snowflakes galore!


Having received my 2010 Swarovski snowflake ornament today (picture above), I thought I would put up some pictures of the paper snowflakes I made for the house. I went ahead and also took some images so that I could post instructions on how to make snowflakes of your own! Enjoy!!

Paper Snowflake instructions:

1. Take a piece of paper and cut it if you need to, to ensure you have a square

2. Fold the square into a triangle and then fold 1/3 of the triangle across like this:

3. Fold the other 1/3 over across the first 1/3

4. Cut the top off

5. Begin to cut any design you like, this is fun as you can use your imagination.

I found a website this week that did this, so I decided to include images of both the designs that I cut, and the subsequent snowflake pattern that you get with the design (in each set, the first image is the cut-out and the image immediately following it is the snowflake). Have fun with it!

Happy decorating!!

Monday, November 29, 2010

Decorating sans Tree!


Image courtesy of Martha Stewart

Bring on Christmas! I love this time of year, but boy has it snuck up on me!! I cannot believe how quickly the year has flown, so much so that there are no weekends left for me to go to our other home in St.Pete to pick up the Christmas tree, so this year I am decorating WITHOUT a Christmas Tree...this is a first!! This is also a first for my blog, but I have already made all the things I am blogging about, so I have photos of my actual hand made decorations...feeling very organized!

Ok, so I decided to cut snowflakes out of paper and then I realized that I could also make a Christmas tree out of paper. I stumbled upon a great Christmas tree design which you can find HERE ! You can use the instructions on their website or you can follow what I did.

1. First take 4 large pieces of paper and fold them in half lengthwise

2. Glue the outside half of one of the pieces of paper to the outside half of another

3. Continue this until you have glued all of the pieces together and you can open this structure up so that it stands on its own as below

4. Fold all of the pieces so that they all collapse down into a half piece, then sketch your desired design onto the paper, the design below is from the website I mentioned above

5. Once you have cut out the desired design,open up the tree so it stands up...voila!

This design has a more traditional look, if you prefer a more simple look, you can try this tree which has more basic lines.


Popcorn and cranberry garland

This year is my first try at making this great decoration. Since I don't have a tree, I have to create more imaginative decorations for this year. I was so excited to try this, and now that I have eaten a mountain of popcorn, and it's all finished, I am super excited!

1. Pop some plain white popcorn (no butter toping) and leave this out overnight. Fresh popcorn is too brittle, day old popcorn is softer and easier to work with.

2. Buy some fresh cranberries


3. Once you are ready to work, make sure you are wearing clothes that you do not mind getting dirty as cranberries can leak red juice all over you, and work on a surface that is non-porous

4. Use thick string (thread) long enough for your garland and begin by threading the string (thread) onto a needle, double the string over and tie the end in a knot.

5. Thread a cranberry onto the string and ensure the knot can hold it in place. Thread popcorn, then alternate these in the pattern you desire.

6. When you have reached the desired length, tie the end then hang on your tree!
As I mentioned, I don't have a tree this year, so I am placing mine on my wreath!

Pretty easy huh?

I wanted to include one more picture. I bought these gloves in a gift shop at the "Lodge" in Unicoi State Park, Georgia. They go so well with my red/white Christmas decorations this year!

Happy Christmas decorating!!

Wednesday, November 10, 2010

Bring on Thanksgiving!!


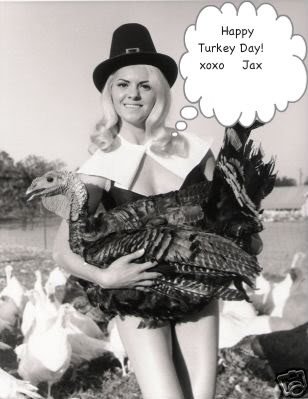
I put this picture in as my friend Arna always writes "Happy Turkey Day" on her FB status for Thanksgiving, it reminds me of her :)

Now that Halloween has passed, and we are already half way through Movember, it's time to plan for Thanksgiving. I have been doing a lot of browsing on the web for good table decorating ideas because, let's face it, we're just going to be sitting around a table with our family eating and drinking, right?

The traditional decorations seem to be all based around the turkey, pumpkin, and fall leaves. However, this year I loved the idea from Martha's website of using squirrel decorations, like these fabulous squirrel favours

When I was a child, one of my favourite toys was a wind-up squirrel that would walk forwards while holding an acorn which it moved towards and away from its mouth. The acorn never quite reached the squirrel's mouth, so I would watch this thing for hours, anxiously waiting for the acorn to fully reach its mouth and for the squirrel to take a bite (did I mention I was very young?). Anyway, from that point onwards I have loved acorns, so I thought this year that my decorating theme for Thanksgiving should be acorns.

So in search of acorn related decorations I fist consulted Martha's website, who did not disappoint, and offered these acorn napkin rings

Tools and Materials
Acorn caps and nuts
22-gauge wire, cut into two 16-inch pieces
Floral tape
Seam binding
Drill
Wood glue

Making an Acorn Napkin Ring
1. Drill two holes through two acorn caps, one on either side of the stem. Starting on the outside of the acorn cap, insert one end of a wire length through a hole, then back through the opposite hole. Twist wire together. Repeat with second acorn and length of wire. 2. Glue nuts to caps with wood glue and wrap one wire with floral tape. Repeat for the other wire. Hold both wires together so the acorns are facing opposite directions. Wrap together with tape. Wrap again with seam binding, using a dab of glue to hold the binding in place. Bend into a ring to form napkin holder.

Martha, as always, will come up with a unique idea for every topic, so when I saw these acorn lights I was very excited! Click the link to get the how-to, I'm definitely trying this one!

If you like to be super coordinated then you may want to have acorn-related food dishes. Since I cannot imagine eating an acorn, I think this recipe for Acorn Squash with Rosemary is perfect, it looks delicious, and is very much a Thanksgiving food!

Now, if you you want your food to be shaped like an acorn then this acorn shaped cake will be perfect! I love the fact that it is covered in chocolate and lollies (candy, to my American friends)!
For name plates you can use various coloured papers to cut out acorn tops and bottoms (from Danielle's place) and glue them together for some acorn name plates :)

Enjoy your Thanksgiving, we'll be in the mountains of Georgia...bring on fall colours!

Saturday, October 23, 2010

Bring on Movember!


It's just over one week away folks, the moustache-inspired month of Movember, that started in my home town of Melbourne. Back when I was still living in Australia, I remember years ago our friends shaving their facial hair, then growing amazing works of art on their faces during the month of November. Well as it turns out, this has now become an international event and here in Jacksonville our good friend Sean Collins, who started the Jax Beardsmith society, is planning many great events for Movember this year. Movember is not just about fun with moustache-related events, the main goal is to raise awareness of men's health issues and to raise money for research related to these.

As you can imagine, since this event is growing at such an amazing rate, the number of moustache-related products also grows at an alarming rate! Movember is not just for the gentlemen, the ladies can also celebrate this jovial month with some fun jewellery, "Moustache Ring"

Or this stylish "Moustache Brooch"

And who can resist this "Moustache Necklace"?

Movember can be a whole family event if you wish, even the dog can join in with his/her very own "Moustache Pet ID tag"

And no home is compete without a set of "Moustache Salt & Pepper shakers"

There are of course many many things for the gentlemen to celebrate Movember, too many to mention, but if you want to make your guy something special to celebrate Movember, like these chocolates, you can get yourself some chocolate molds from "Bake it Pretty"

Happy Movember!!